
Baldwin Park Wood Flooring installs herringbone wood floors in Baldwin Park, CA homes, bringing more than 20 years of hardwood experience to one of the most demanding patterns in the trade. We lay solid and engineered herringbone and chevron floors in living rooms, entries, hallways and dining rooms.
A herringbone floor looks effortless when it is right and obviously wrong when it is not. The pattern exaggerates every layout mistake: a center line that drifts, a zigzag that runs crooked to the front door, or rows that end in slivers against a wall. Getting it right happens before the first board is fastened. We plan the pattern around your rooms’ sight lines, prepare a flat subfloor and choose the installation method that keeps short boards from shifting over time.
Herringbone and Chevron Patterns
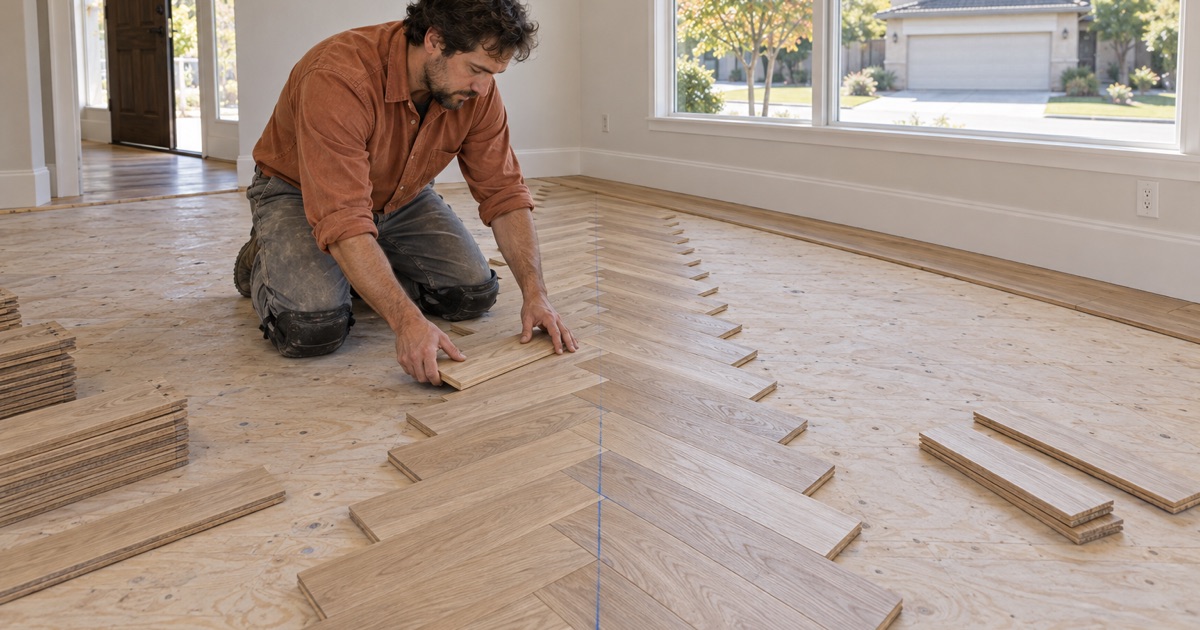
Classic Herringbone
In a herringbone floor, rectangular boards are laid at right angles to each other so the end of one board meets the side of its neighbor. The result is a broken zigzag with a strong sense of direction. It suits both traditional homes and modern interiors, depending on wood tone and board size.
Board proportions change the look. Short, narrow pieces create a busy, classic pattern, while longer and wider boards give a bolder, more contemporary feel. We lay out sample rows so you can see the scale in your room.
Chevron Floors
Chevron boards have ends cut at an angle, so each row meets the next in a sharp, continuous point. The effect is cleaner and more directional than herringbone. Chevron flooring is manufactured specifically for the pattern, so it cannot be cut from ordinary square-ended boards on site without significant waste.
Double and Triple Herringbone
In double or triple herringbone, two or three boards are laid side by side in each step of the pattern. The wider steps create a softer rhythm that works well in large rooms. These variations use standard boards, but they still require the same careful center line and layout planning.
These wider patterns also make good use of wide plank or longer boards, which can reduce the number of short offcuts at the walls. We compare how each variation fills your room before ordering material, since the pattern choice changes how much waste to plan for.
Materials for Herringbone Floors
Solid Hardwood Herringbone
Solid herringbone blocks are usually oak, either red oak or white oak, and are installed unfinished, then sanded and finished on site. Site finishing flattens small height differences between pieces and allows any stain color. Solid wood can be refinished many times over its life.
White oak is a popular choice for herringbone because it takes natural and gray tones evenly, while red oak brings warmer color. Quartersawn boards show a straighter grain that suits formal rooms, and plainsawn boards show more figure.
Engineered Herringbone
Engineered herringbone has a hardwood wear layer over a stable plywood or composite core. It resists seasonal movement better than solid wood, which matters in a pattern made of many short pieces, and it is the usual choice for glue-down installation over concrete. Many engineered products come prefinished, saving finishing time on site.
We compare wear layer thickness across options, since it decides whether the floor can be sanded later. Composite cores also carry formaldehyde labeling under programs such as TSCA Title VI, which we check when you are choosing a product.
Installing a Herringbone Wood Floor
Layout and Center Line
Every herringbone floor starts with a center line, usually aligned with the main entry, the longest wall or the view through connected rooms. We measure the rooms, check that walls are square and plan where the pattern ends, so partial pieces at the walls are balanced rather than tiny slivers on one side.
In open floor plans, we decide early whether the pattern runs continuously through several rooms or is framed by a border at doorways. That decision affects material quantity and how transitions look.
Subfloor Preparation
Short herringbone boards reveal every dip and hump beneath them. We check flatness across the whole area and correct it by grinding high spots, filling low spots or adding plywood. Over a slab, moisture testing, including ASTM F2170 in-situ relative humidity testing when the product calls for it, comes before any adhesive.
On a raised foundation, loose or damaged subfloor panels are fastened or replaced first. Particle board found under old carpet is removed, because it cannot hold the fasteners a nail-down pattern floor needs.
Glue-Down and Nail-Down Methods
Over concrete, herringbone is typically glued down, which keeps each piece locked in place. Over plywood, many installers combine adhesive with fasteners so short boards cannot shift or squeak. The method follows the flooring manufacturer’s instructions for that specific product.
Acclimation and expansion space still apply to a pattern floor. Boards are brought into the house ahead of installation and checked with a moisture meter, and a gap is left around the perimeter under the baseboard or shoe molding so the field can move without pushing up at the center.
Finishing, Borders and Care
Borders and Transitions
A border of straight boards around a herringbone field frames the pattern and simplifies the edges at walls and cabinets. At doorways, we install flush thresholds, reducers or T-molding where the floor meets tile or another material. Planning these details early keeps them looking deliberate rather than improvised.
Sanding and Finishing Herringbone
Because boards run in two directions, sanding herringbone takes angled drum sander passes followed by extensive orbital sanding to remove cross-grain scratches. We finish with products that meet SCAQMD Rule 1113 and its 275 grams per liter limit for wood coatings.
Living With a Herringbone Floor
The mixed direction of herringbone hides scratches and scuffs better than long straight boards, which suits busy households. Felt pads under furniture, entry mats and prompt cleanup of spills keep the finish in good condition. When the finish wears, a screen and recoat restores it without sanding.
- 20+ Years in Wood Floors
- Free Written Estimates
- Rental and Claim Documentation